Integrating Okta for Single Sign-On (SSO)
This guide explains how to create an Okta OIDC Web Application for SSO with the RHL ASM Platform.
Prerequisites
- You have Admin access to your Okta tenant.
Create an OIDC Web Application in Okta
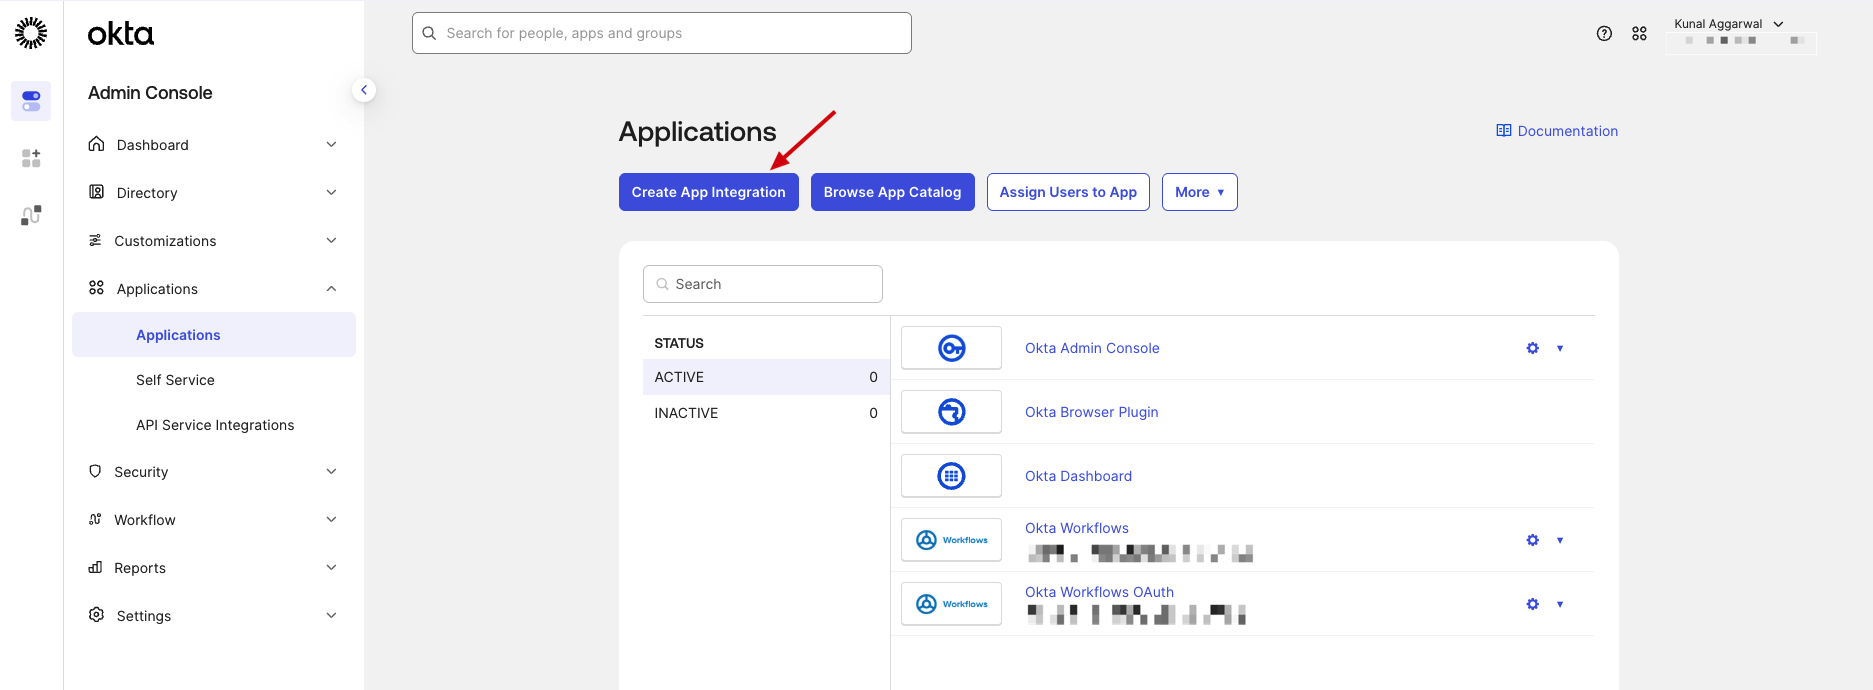
- Sign in to the Okta Admin Console.
- Go to Applications > Applications.
- Click Create App Integration.
- Under Sign-in method, choose OIDC - OpenID Connect.
- Under Application type, choose Web Application.
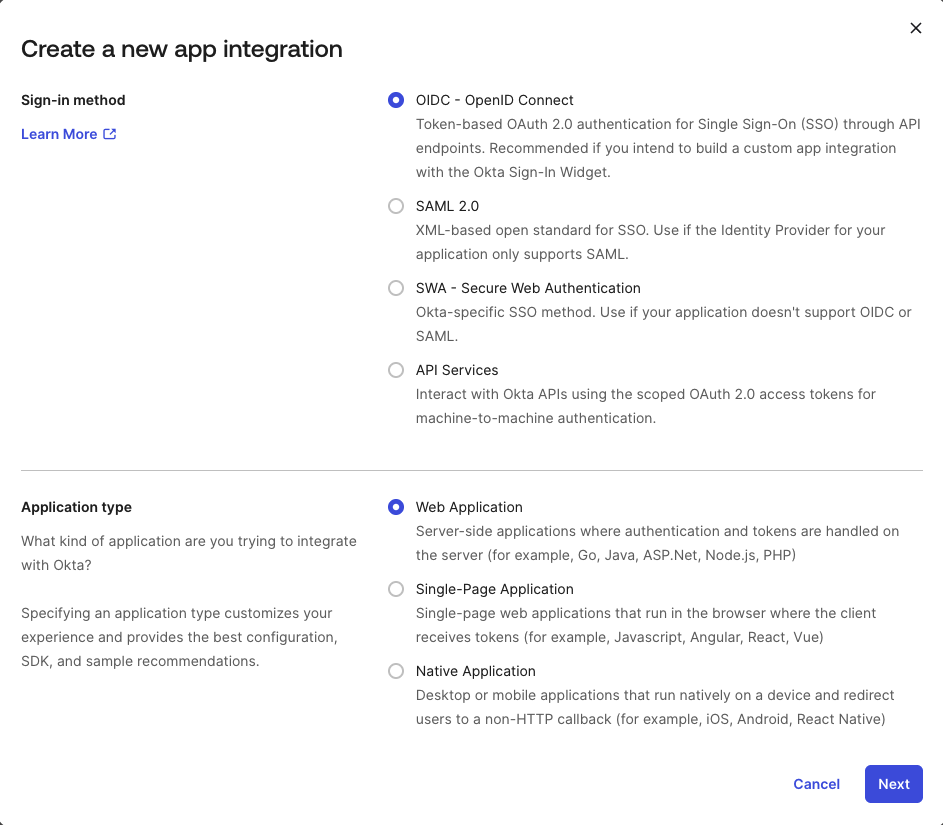
- Click Next.
- In App integration name, enter a recognizable name (for example,
RedHunt Labs ASM Platform). - In Sign-in redirect URIs, add the following redirect URI
https://app-nvadr.eu.auth0.com/login/callback - In Sign-out redirect URIs remove the default URI.
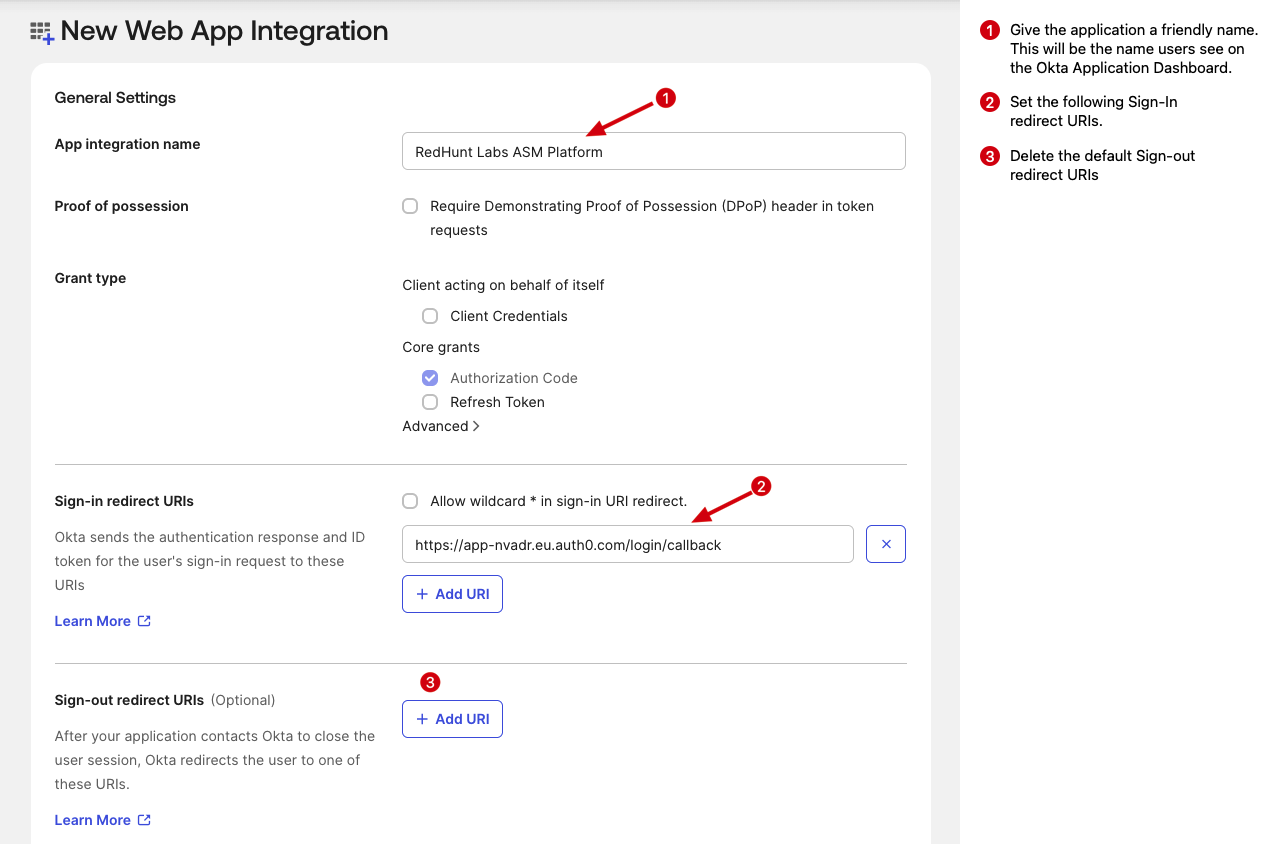
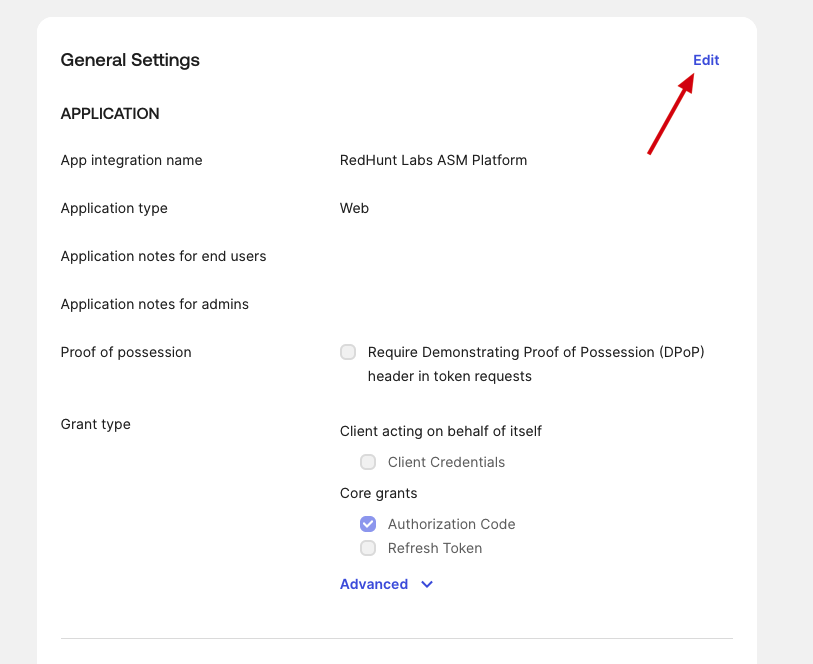
- Keep grant type as Authorization Code (default for web apps).
- Under Assignments, choose your access model:
- Allow everyone in your organization to access, or
- Limit access to specific groups/users.

- Click Save.
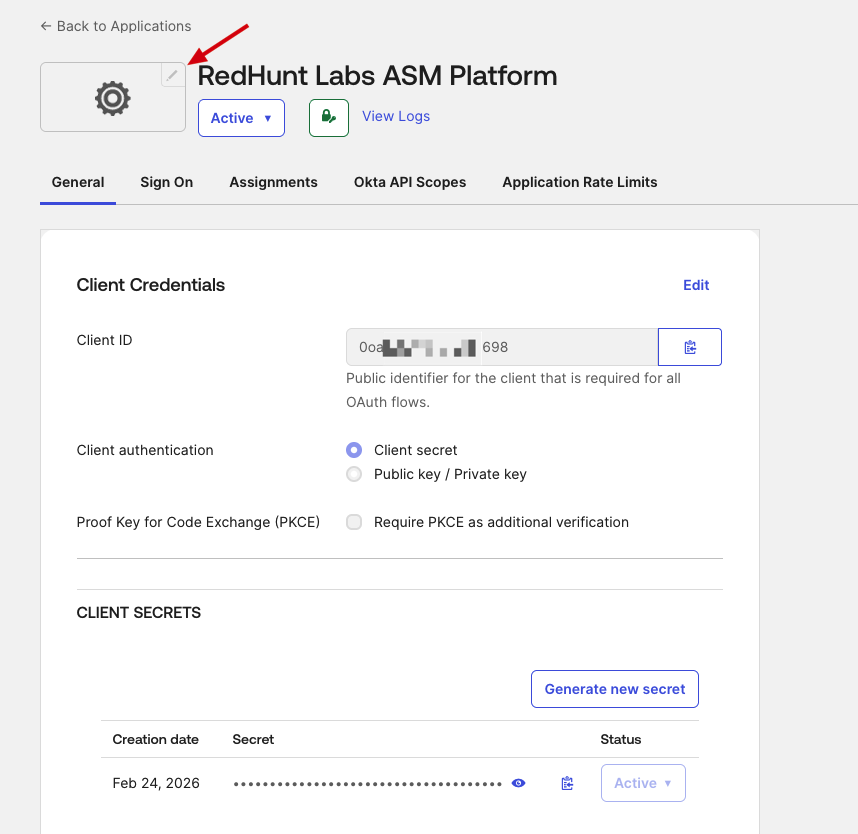
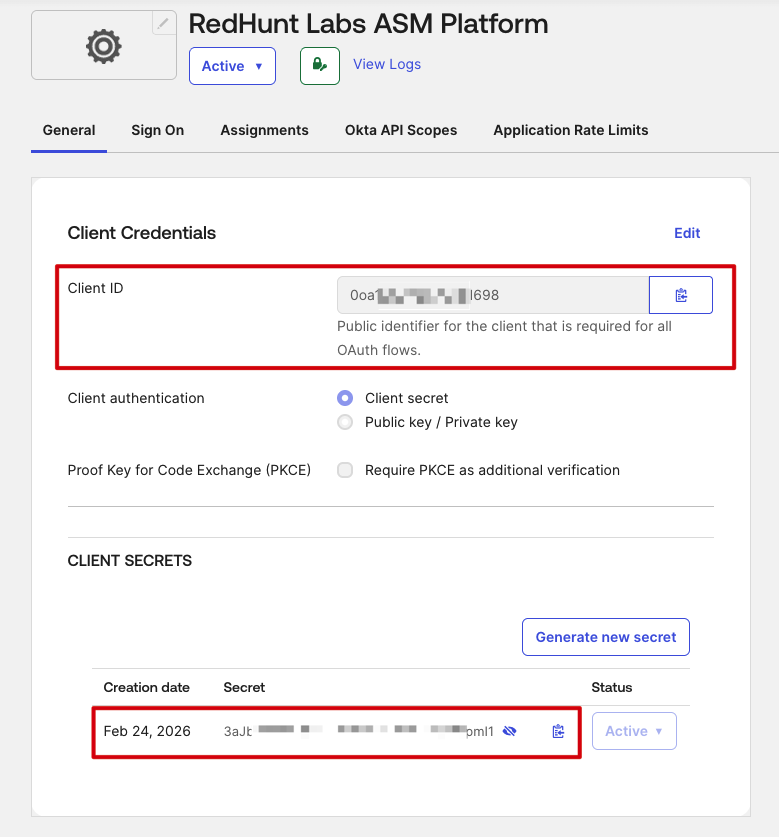
Collect Required Values from Okta
After creating the app, collect the following details from Okta:
- Client ID
- Client Secret
- Okta Domain (see image below)
Share the above values with RedHunt Team.

Additional Okta App Settings
After sharing the required values, complete the following settings in your Okta app:
- Open the app you created in Okta.
- Go to General > General Settings and click Edit.
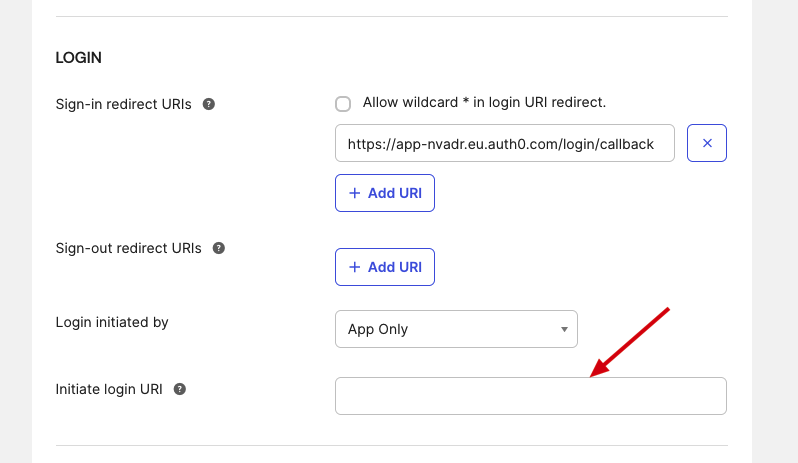
- Under Login initiated by, change the value to Either Okta or App.
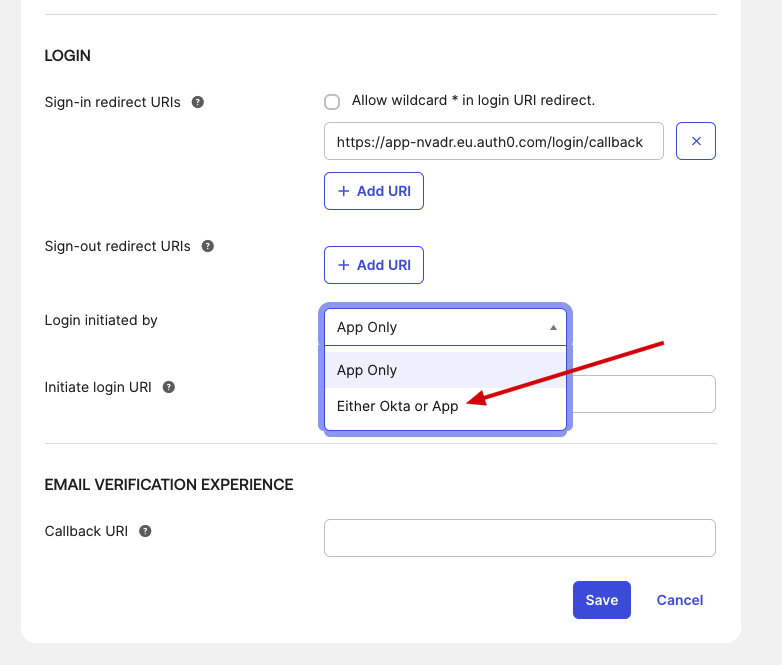
- In Initiate login URI, enter the URI provided by the RedHunt team after the Client ID and Client Secret are shared with them.
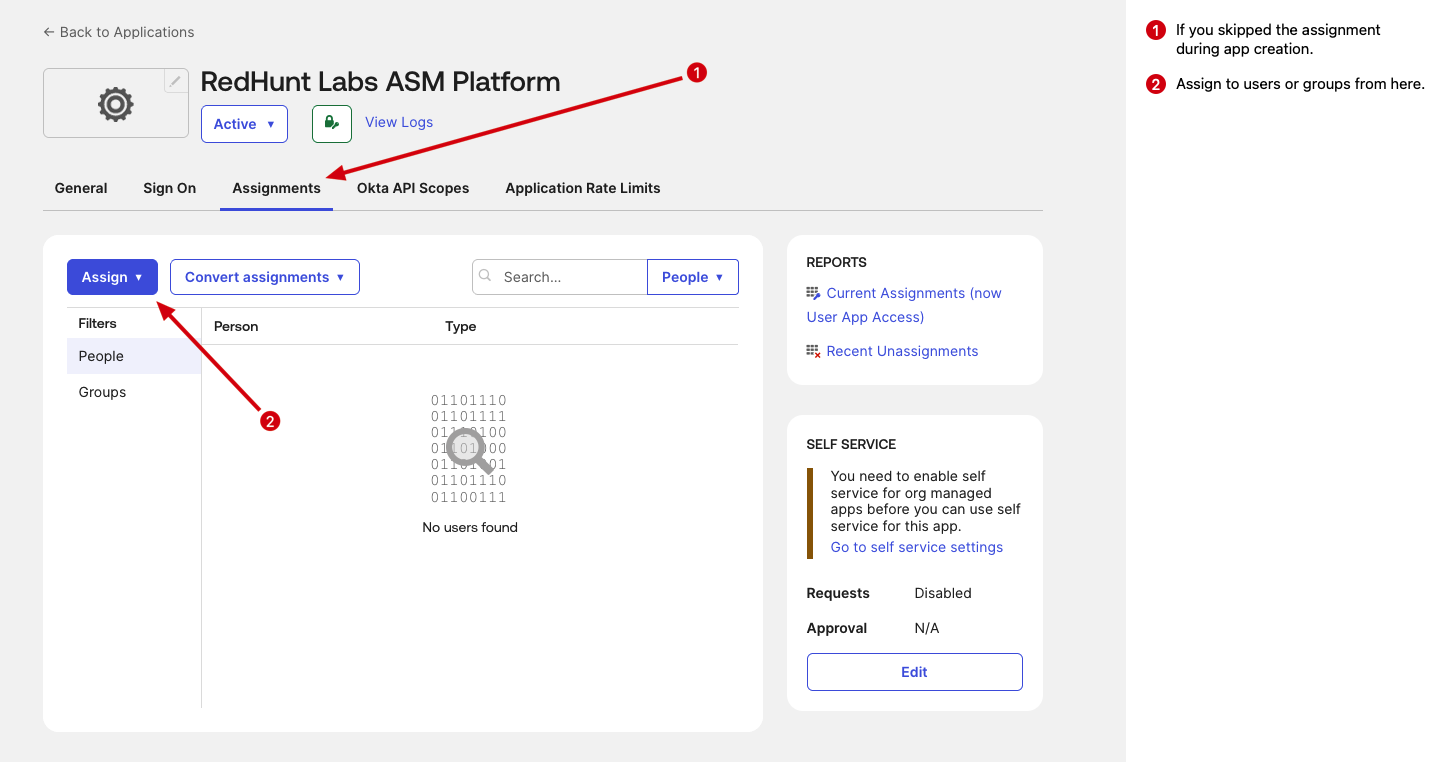
- Go to the Assignments section and assign the app to required users/groups.
Optional Okta App Settings
- Add an app logo for better user visibility in the Okta dashboard.
- Download the official RedHunt Labs logo from the Media Kit page and upload it in Okta app settings: https://redhuntlabs.com/media-kit/